Paneer/Panir Cheese – Kylie Cook
Submitted by Kylie Cook
Sunday Bell Farm
North Danville, VT
Paneer is the easiest cheese on earth to make. Literally anyone can do it. And I guarantee all the ingredients are already in your kitchen. Paneer is a fresh/unripened cheese. It is mild, firm, chewy, creamy, and slightly squeaky in nature. Alone it doesn’t have much flavor but when cooked, works as a sponge to soak up the flavor of herbs and spices. Paneer is traditionally found in Indian dishes but can be easily adapted to any style of cuisine. It is a fantastic and flavorful alternative to tofu and other soy based proteins.
Basic Paneer Cheese:
1 gallon whole milk
8 tbsp. lemon juice, white, or cider vinegar. Alternatively 2 tsp. of citric acid dissolved in ¾c hot water can be used.
Optional: 1-2 cups hot water.
Optional: salt to taste.
- In a large pot heat the milk to a gentle but rolling boil. Stir often to prevent scorching.
- Reduce the heat to low and add in the acid before the foam subsides. Curds should begin to separate immediately. Feel free to add another tablespoon of acid if they don’t. Cook for 10-25 seconds more.
- Remove from heat and continue to stir gently until large curds form. The whey should be clear and almost green in color. If the whey is still milky, return to heat and add a bit more acid. Add salt to taste if desired.
- Once the curds and whey are clearly separated, remove from heat and let set for 10 minutes. For a very soft cheese, add 1-2 cups of hot water.
- Once curds have fallen below the whey, they are ready to drain. Ladle into a colander lined with butter muslin (or a thin clean cloth). Rinse the curds under a stream of cool water for a couple minutes to remove the acid and whey. Gather the corners of the muslin together and gently twist to squeeze out any extra whey.
- Shape the cheese bag into a disc 1-2 inches thick. Place the cheese, still wrapped in the muslin, on a cutting board or similar surface. Cover with a plate. Place 5 pounds of weight on top of the cheese to continue pressing and draining the cheese. The 5lb weight could be in the form of a stack of plates, a brick, or a pot of water, the possibilities are endless.
- Leave the weighted cheese for 1-2 hours. Feel free to place in the fridge but it is fine to stay on the counter if there is no room.
- Use immediately, fresh is best! Refrigerate before cooking if you would like a firmer cheese. Can be stored in an airtight container for up to a week. Can also be frozen for several months.
How to make your own Yogurt
Making homemade yogurt is very easy, and doesn’t require much equipment. I began making my own yogurt in late spring/early summer of 2020 through a little instruction from a friend and the ability to acquire a gallon of raw milk each week from the same friend’s cow. I haven’t purchased any yogurt since!
Necessary equipment:
1 gallon of whole milk, preferably raw
4 tablespoons of plain, unsweetened, raw, whole milk yogurt (This can be purchased from the Littleton Food Co-op, or find a friend who makes their own and ask for a small amount)
A large pot
A large metal spoon and a large slotted spoon
Small bowl
A medium to large sized cooler
8 clean, quart sized mason jars and lids (at least 4 of these should be wide mouthed for the yogurt)
2 bath towels
A reliable cooking thermometer
A note on using raw milk yogurt as your starter:
When you purchase yogurt starter culture in a package, you are getting a limited amount of active cultures. This means that after a couple of yogurt batches, the cultures will be used up and you will need to purchase another package of starter cultures. If you use raw milk yogurt as your starter, you are getting a diverse amount of active cultures to work with. These cultures will result in many, many batches of yogurt before you will need to purchase more yogurt to boost your starter. I have made at least 20 batches of yogurt from the one jar of raw yogurt that I had initially purchased several months ago!
You can skim the cream off the top of the milk and save it for another use, or just pour it and the milk into the large pot. The cream will make a beautiful, creamy top on the yogurt so I highly recommend using it!
Pour the gallon of milk into the large pot and turn the stove to medium. Check the milk every couple of minutes with the thermometer. When the milk reaches 180 degrees Fahrenheit, turn off the heat. Let the milk sit until it cools down to between 115 and 118 degrees. Depending on how warm your kitchen is this takes approximately 2 hours.
While the milk is cooling it’s time to build your yogurt incubator! I put the empty mason jars near my wood stove so they get nice and warm. Heat up a gallon of water on the stove until it reaches about 160 degrees Fahrenheit. Pour this water into four of the mason jars (Save the wide mouth ones for the yogurt) and place the lids on them. Place these jars of hot water in the cooler and tuck the bath towels around them.
Now is a good time to measure out the 4 tablespoons of yogurt into a bowl and let it reach room temperature.
When the milk cools to around 115-118 degrees, use the slotted spoon to remove the skin off the top of the milk. Add a few large spoonfuls of the milk to the 4 tablespoons of yogurt and whisk or stir to combine the yogurt and the milk. This will remove any lumps from the yogurt. Add this to the pot of milk and whisk or stir well to combine. Using a funnel to pour the milk and yogurt mixture into the four wide mouth quart jars. Wipe off any spilled milk and secure the lids. Open the cooler and remove the towels. Place the jars of yogurt around the jars of hot water. Tuck the towels around the jars. Try to work quickly so that you don’t lose all of the heat you’ve curated. Close the lid of the cooler. I recommend placing a sign on the cooler like “Please keep this closed- yogurt in progress” to guarantee that the lid won’t be opened prematurely. Let the yogurt sit in the incubator for 8-10 hours. Once you remove it I will often let it sit on the kitchen counter for another couple of hours to finish thickening.
This yogurt is delicious plain, but you could also experiment with adding flavors and sweeteners. Maple Syrup, vanilla, fruit, or jam are all wonderful additions.
Garlic Scape Pesto – Gretchen Boswell
Submitted by Gretchen Boswell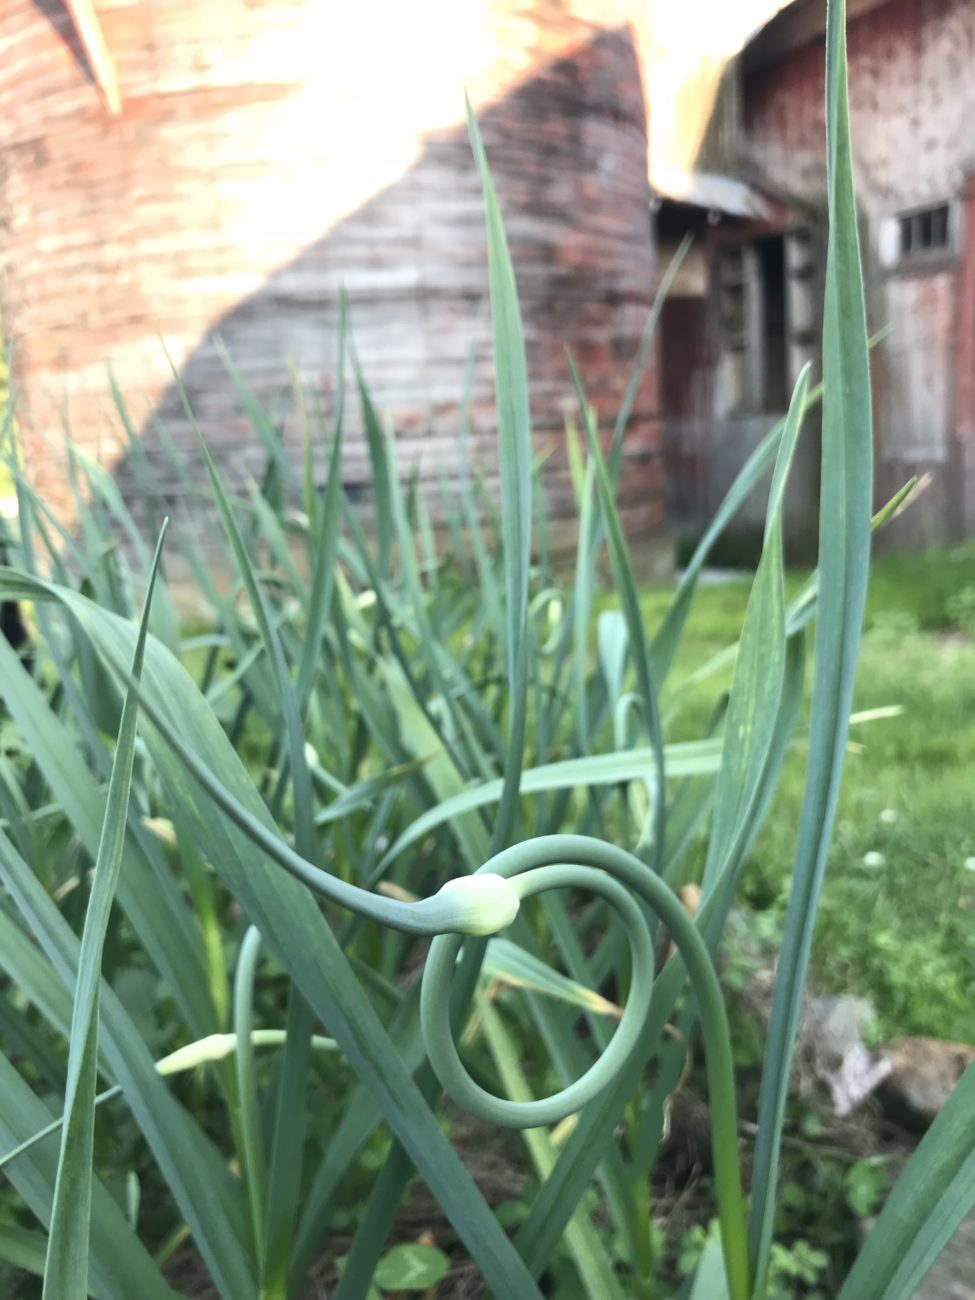
Prof de Français
Lyndon Institute
This is a family go-to all throughout the summer, uses garlic scapes quickly, and is perfect in pasta or grain salads, on pizza, in eggs, or simply with some crackers or sliced veggies from the garden. It is always a crowd pleaser at picnics and potlucks, too.
In the food processor, chop up together, blending until smooth:
- Approximately 10 garlic scapes (the curly flower and smooth round stalk of the garlic green that feeds into the fibrous leaves) or about 1/2 lb.
- 1/2 to 1/3 cup grated parmesan, depending on how cheesy you like it
- 1/3 cup slivered almonds or chopped walnuts (either works well, but walnuts tend to make a smoother pesto)
- 1/2 cup olive oil
- Juice of 1/2 lemon
- Sea salt to taste
- *Optional: a spoon of honey or agave to ease the relative sharpness of the garlic
Keep in the fridge for several weeks and/or freeze to enjoy during the winter months.
Bon appétit!
Seville Orange Marmalade – Joan Harlowe
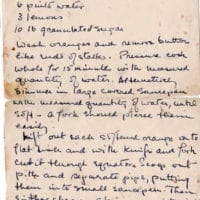 [This marmalade] has a good backstory: it was given to me by an Englishwoman at whose house in Kent I had tea, many years ago, and she served this marmalade at the time. So just for fun, I include below her recipe from 50+ years ago, in her handwriting.
It is important to use Seville oranges — these are bitter and have a short season in midwinter. I get mine from the FloridaOrangeShop.com (800-672-6439)
Ingredients:
Makes 18-20 pounds.
5 lb Seville oranges
6 pints water
3 lemons
10 lb sugar
Wash oranges and remove button-like ends of stalks.
Cook whole for about 15 minutes with 6 pints of water until a fork can pierce them easily.
Lift out each orange onto a flat dish, cut it through the equator and scoop out the pith.
Separate the seeds, put them in a small saucepan, add a pint of water and simmer them for 10 minutes.
Chop up the oranges or put them through a mincer
Put the oranges in a preserving pan, add the juice from the simmered seeds and add the juice of the lemons and bring to a boil.
Throw away the lemon seeds – they are bitter.
As soon as the fruit is boiling stir in the sugar and bring to a boil again.
Boil rapidly until set is obtained.
Put into jars and seal at once.
Watermelon Pickles – Terry Hoffer
In our family, Thanksgiving without this would be just another turkey dinner. Recently a poor imitation has begun to appear on the shelves of some grocery chains, but there is nothing like homemade.
Ingredients:
3 lbs. watermelon rind. Thick outside skin removed and cut into 1 inch cubes. (One large watermelon will yield about 5 lbs. of rind)
5 c. sugar
2 c. cider vinegar
1 c. cold water
1 Tbsp. whole cloves
1 Tbsp. whole allspice
6 sticks cinnamon
1 sliced lemon
Directions:
Soak rind in water to cover with 2 Tbsp. salt per quart of water for 4 hours or overnight. Drain and Rinse.
Boil rind to tender (30-40 minutes). Drain.
Combine sugar, vinegar, water, spices, and sliced lemon. Boil for 5 minutes.
Add watermelon. Cook until translucent. (30-45 minutes).
Pack in small (8 oz.) hot sterilized jars distributing spices and lemon slices evenly. Leave ¼ inch head space. Wipe rims clean. Seal according to manufacturer’s directions.
Process jars in boiling water for 10 minutes.
Zuccchini Pickles – Judy Daloz
Ingredients:

1 quart white vinegar
2 Cups sugar
1/8 Cup salt
1/4 tsp crushed red pepper
2 tsp celery seed
2 tsp turmeric
1 tsp ground mustard
5 pounds zucchini, unpeeled, cut into 1/4″ slices
1 quart thinly sliced onions
Combine vinegar, sugar, salt, pepper, celery, turmeric, mustard in 2 quart sauce pan. Bring to boil, stir.
Pour liquid with spices over onion and zucchini. Let it stand for one hour.
Bring zucchini and liquid to boil and simmer for 3 minutes.
Store in sterile, sealed jars.
No Muss No Fuss Hearty Sourdough Loaf – Alyssa and Rhonda Korol
WARNING: Sourdough is habit forming (we’ve had to limit ourselves to one to two loaves a week)! We got started when we were gifted some starter and it’s been hard to stop. There are also so many great recipes online for using up the discard that will develop over time. We’re fond of the King Arthur recipes for pancakes, sourdough scones, and sourdough pumpkin bread. This bread recipe is cool because it has no additional leavening—just the sourdough starter. And we like the wholewheat flour which gives the loaf some extra flavor. Enjoy!
Ingredients:
1 cup ripe (bubbly) sourdough starter, stirred down
2½ cups white all-purpose flour
3/8 cup whole wheat flour
7/8 cup room-temperature water
1 1/4 teaspoons salt
Tools:
Parchment Paper
Crock Pot
Oven-safe Ceramic Plate
Directions:
Combine all ingredients (starter, both flours, water, and salt) in a large bowl and mix well, until all the flour has been incorporated and the dough has come together. Add extra water or flour if needed so that the dough is soft and somewhat tacky. (We usually need an extra tablespoon or two of water.)
Knead the dough until it is smooth, though still soft and tacky. (This can actually be done in the bowl or on a floured surface and is a gentler process than kneading yeasted dough.) Leave in a covered bowl (we use a plate) and let rise for 1 hour*.
Give the dough a “letter fold”. Turn dough out of bowl onto a floured surface. Gently flatten dough then stretch each side and fold in thirds, like a letter. Then turn dough 90 degrees to repeat the fold one time.
Take bowl and place two strips of parchment inside, crossing to form a sling for the dough to sit on. Gently transfer dough to the bowl, seam side up. Cover with a plate and let rise for 3-4 hours, or until light and airy and about doubled in size.
About 30 minutes before bread is ready to bake, preheat oven with crock pot covered with oven safe plate inside to 450°F.
When loaf has risen, slash it with sharp knife or a baker’s lame (a special tool for cutting dough). Then, use the parchment paper sling to gently transfer the loaf (and sling) into the preheated crock-pot. (Be careful of the hot pot!) Cover with preheated plate.
Reduce oven temperature to 400°F and cook covered for 20 minutes.
Remove plate and cook uncovered for 35-40 minutes, or until bread is crusty and golden.
Remove crockpot from oven and use the sling to transfer the loaf to a rack. Allow the loaf to cool a bit because cutting bread that is piping hot can make the texture gummy.
Tips and Tricks:
*Our house tends to run cold, so we put our dough somewhere warm to rise: either in the microwave or near a heater.
Lemon Poppyseed Summer Squash Bread – Christina Cotnoir
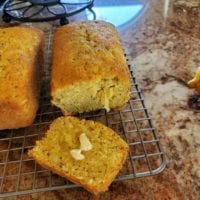 Like many this year, we planted a large garden this summer and had extra yellow summer squash. This was the perfect recipe to use some up, and delicious warm with a dab of butter and a cup of coffee!
Ingredients:
1 cup melted unsalted butter
2 cups granulated sugar
Juice & zest of 2 small lemons
1 teaspoon almond extract
1/2 teaspoon vanilla extract
3 large eggs
1 teaspoon salt
1 teaspoon baking soda
1/2 teaspoon baking powder
3 cups all purpose flour
2 cups shredded yellow “summer” squash
1 tablespoon poppy seeds
Instructions:
1. Preheat oven to 325 degrees
2. Grease and flour loaf pans
3. Place melted butter, sugar, lemon juice and zest, almond and vanilla extract in a large mixing bowl. Cream together until light and fluffy, 1-2 minutes.
4. Add eggs one at a time, mixing until fully incorporated.
5. Evenly sprinkle the salt, baking soda, and salt over the mixture and mix well.
6. Add the flour ½ cup at a time, mixing entirely between additions.
7. Fold in squash and poppyseeds.
8. Divide batter between prepared loaf pans.
9. Bake large loaves for 1 hour, small loaves 30-40 minutes until toothpick inserted in the middle comes out clean.
10. Cool a minute or two in the pan and then remove to a rack to cool.
This recipe freezes well and doesn’t need refrigeration, but will last longer if refrigerated.