Booklet for Catamount Arts Community Journaling Project
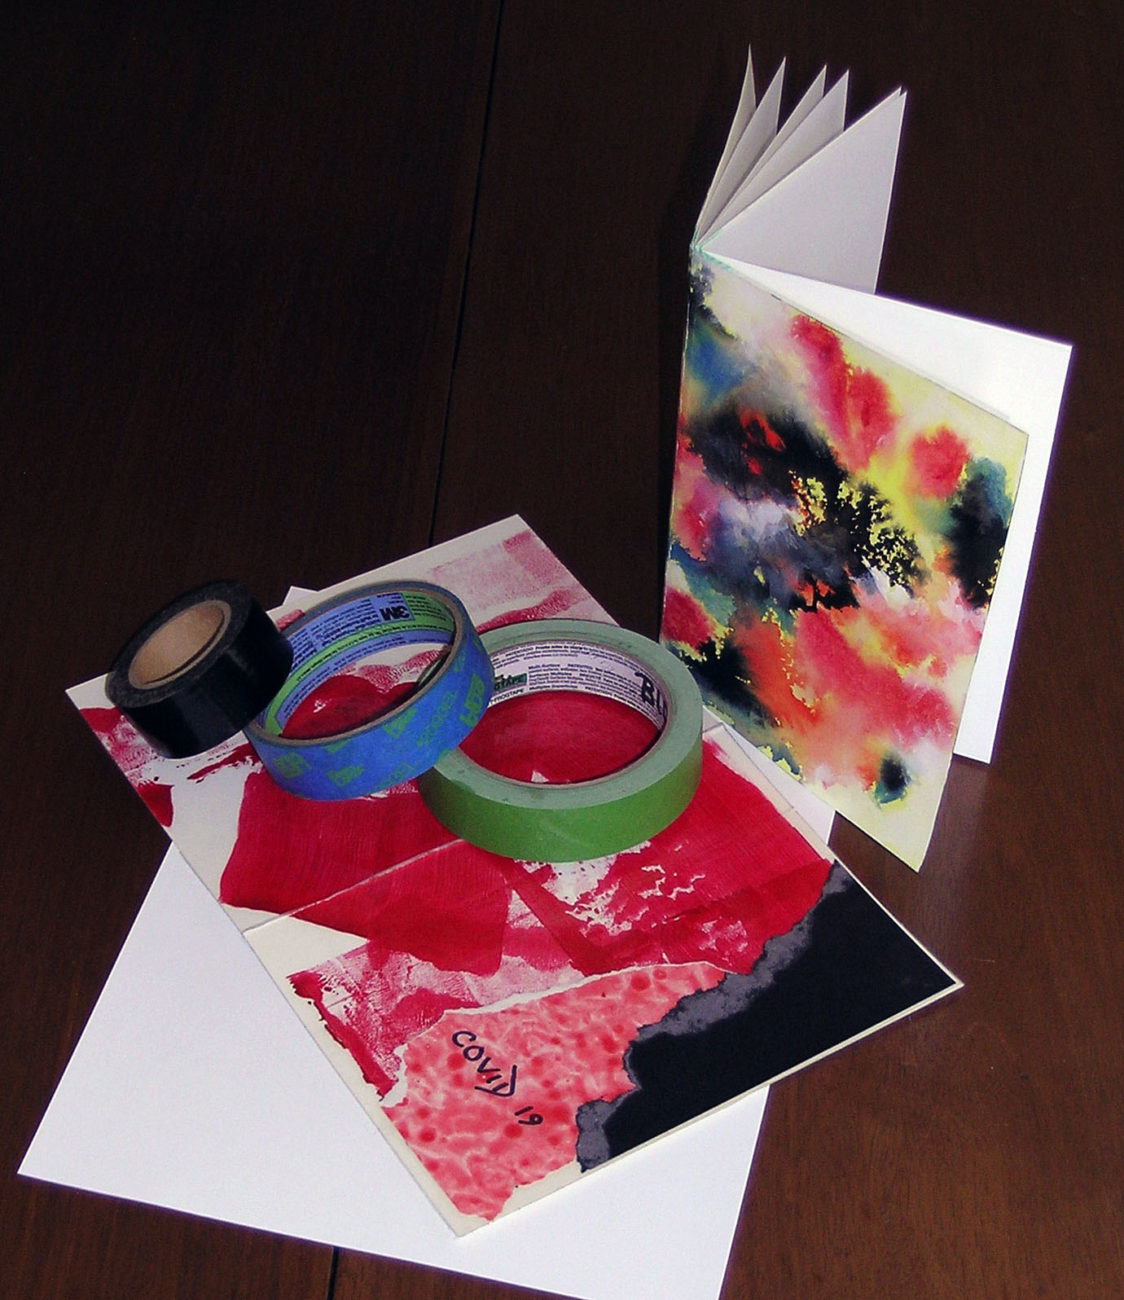 includes space for four double spreads
You’ll need some basic supplies such as pencil, ruler, glue stick, scissors, masking or packing tape, sturdy paper and cover material (see below).
For the Cover
Choose one of the following that’s 8 ½ by 11inches or a bit smaller:
Thin cardboard
Stiff Cardstock
Two pieces construction paper glued thoroughly together, and pressed with heavy books
Cut up cereal box
For the Pages
slightly smaller than cover, 8 ¼ by 10 ¾ inches for a 8 ½ by 11 inch cover.
Paper for pages could be:
Sturdy found paper
Watercolor paper
Drawing paper
Brown paper bag paper
(computer paper is too light weight, but if it’s all you have, use it)
1. Start your cover by decorating the front of your cover paper.
You can create careful lettering of your own title
Or fill the space with a scribbled phrase and some background
Or make a design or collage or picture of your choosing
Or you can duct tape the whole cover
If you want a cleanable cover over your own design, use clear packing tape to cover your cover design (if you’re using duct tape, that will be your cleanable cover)
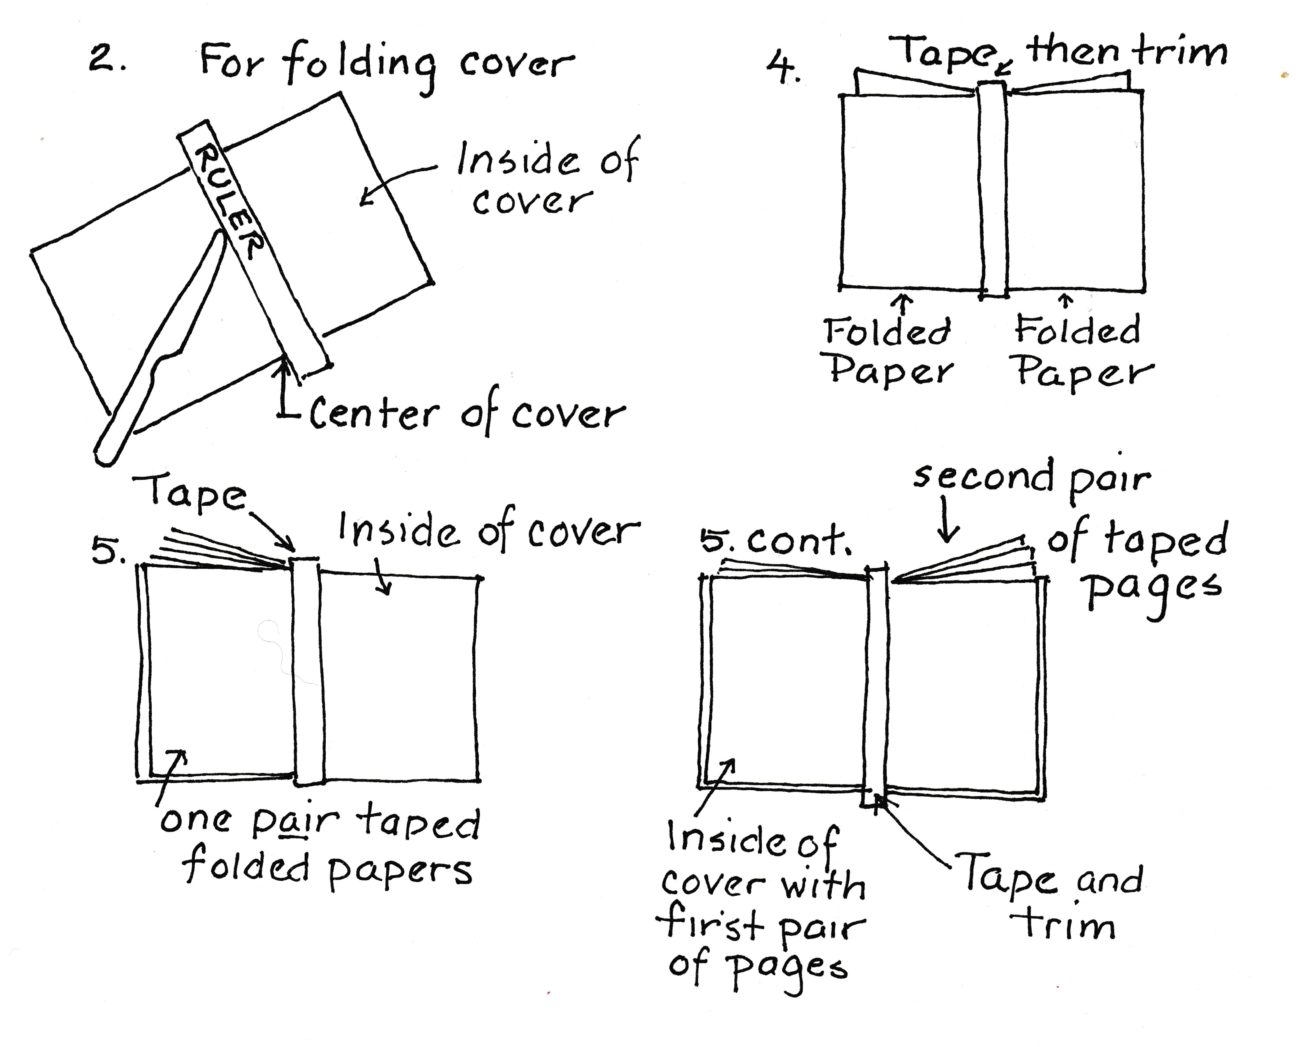
2. Fold your cover.
Advice on folding the cover: You can fold your cover so that it looks like a traditional book right after you get the material the right size for you, or you can wait to fold until you have done your cover design, whichever works best with your materials. Heavy materials don’t fold easily after they are adhered to the paper. Light materials are easy to fold.
For folding: Find the middle on both long sides on the inside of your cover paper. Mark with a dot with pencil. Place your ruler across the cover at the dots. Use an ordinary silverware knife (or bone folder if you have one) to make an indentation in the cover paper right beside the edge of the ruler. Go over indentation several times. This indentation line will make it easier and neater to fold your cover paper. Once your cover is folded, you may want to touch up your cover design, since the cover may fray a bit at the fold.
3. Fold your four pages in half. Check that they fit neatly inside the cover.
You will be using tape to attach the pages to the cover because it’s easy. Possibilities include:
Packing tape, either clear or tan, masking tape, electrical tape, in a pinch wide scotch tape (washi tape doesn’t stick well enough)
4. Line up one folded paper for pages with another folded paper so that the fold edges are tight against each other. Using a piece of tape the height of your pages, tape the two folded papers together at the folds by placing the tape evenly. Repeat with the other two folded papers.
5. Open up your cover. Turn one set of folded papers inside out so the tape is between the two papers. Place one pair of folded papers so that the folds are right along the line of the fold on the open cover. Use a strip of tape the height of the pages to stick the pages to the cover. Now flip those pages so they rest against the cover and hide the tape.
6. Place second pair of folded papers (once again turned inside out) along the line of the cover fold, with the papers on top of the first pair. Attach the second set of folded papers to the cover using another strip of tape.
7. Keep the cover of your booklet open with two folded papers on one side and two folded papers on the other side. Finish the inside of your journal by taping one strip of tape the height of the pages along the middle of the booklet to connect two folded pages to the two other folded pages. After this process, you should have four clean double spread pages to work on for the journal.
NOTE: If you have trouble getting the tape evenly placed, use smaller pieces of tape first. Then neatly cover with the longer strips